While you may understand the motion and theory of the flutter kick, working through flutter kick drills in freestyle can ensure you learn the correct technique.
Whether you’re starting new or want to improve your flutter kick in freestyle (or front crawl), these drills are good starting points for anyone.
Related article: Beginner’s Guide to Swimming Freestyle
Disclosure: This post may contain affiliate links, meaning we earn a small commission at no cost to you if you purchase something through one of our links. As an Amazon Associate, we earn from qualifying purchases. Please check out our disclosure page for more information
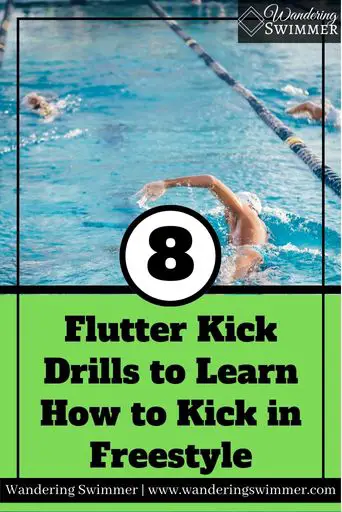
8 Drills to Learn How to Flutter Kick in Freestyle
As you learn how to flutter kick in freestyle, it’s helpful to start from the basics and work your way up. The drills below will help you learn the beginning elements of the flutter kick and help you build up your kick in a simple series of exercises.
Related article: How to Flutter Kick in Freestyle
We do recommend using swim fins for most of these drills, as they’ll help keep you in a more natural and neutral position when kicking. Swim fins will also help build up your leg strength and improve your ankle flexibility.
If you don’t have fins or don’t wish to use them, that’s okay! You may find some of these flutter drills a bit more difficult though when you first start.
1. Ankle Rotations
While this flutter kick drill isn’t in the water, it’s an important exercise to help you kick better in freestyle.
Most people don’t realize that having flexible ankles is important when swimming. Having stiff ankles can make kicking more difficult as your foot cannot flex as much on the upward motion of the kick.
The good news is that this is an easy fix and can be done anywhere! This drill is best done when standing up so you can work balance at the same time. However, you can also do it sitting down.
- To start, bend your knee and lift your foot a few inches off the ground
- With your big toe, draw a circle that’s a little bit bigger than a softball
- Do 10-15 rotations clockwise and then counterclockwise (adjust to your comfort)
- Once done, put your foot back on the ground and do the same with the other foot
- Do this at least daily or twice a day to work your ankle flexibility
When you start with this drill, you don’t need to raise your foot off the ground too much. If you have trouble keeping your balance, you can hold onto something. Although we encourage you to keep your own balance as this drill doubles as a core/balance drill, too.
Related article: 11 Ways to Improve Your Freestyle Kick
As you get more comfortable, try bringing your leg up so your thigh is even with your hip and your knee is bent at a 90-degree angle. This will really work your balance and core!
You can also sit with your legs folded beneath you so the weight of your body stretches your ankles. We’re not overly fond of this drill, as it puts pressure on the knees. But some swimmers are okay with it.
2. Kicking at the Wall
To help you get used to the feeling of the flutter kick, you should start by kicking while holding onto the wall. Grabbing the edge of the wall will help your body stay in place while you kick and keep it afloat easier.
- Keep your arms out in front of you, fully extended
- Your hands/arms should be a bit wider than shoulder’s width
- Start kicking while holding onto the wall
For this drill, you can keep your head down until you need to breathe. Or, you can keep it lifted.
If you have a snorkel you can also use this to keep your head down in the water so your body posture is in line and there is no stress on your neck.
Related article: 5 Flutter Kick Mistakes to Avoid
We do suggest that if you keep your head lifted for this flutter kick drill, eventually you progress to putting your face in the water.
Doing so will give you better balance in the water and simulates the more natural position of freestyle.
It’s also a good way to be able to duck your head down to watch your legs kick. Do this to see if you’re bending with your knees when you kick.
3. Without the Wall Flutter Kick Drill
Once you feel that you’ve mastered the previous drill, it’s time to ease yourself off the wall! For this drill, you’ll still be stationary at the wall but you won’t be holding onto it anymore.
- Start the flutter kick drill as you did in the previous drill: arms extended and holding onto the wall while kicking
- Push yourself back from the wall until just the tips are holding onto the surface of the wall
- Begin kicking again until you have your rhythm
- Once ready and comfortable, let go of the wall and keep kicking
- Your fingers will need to push against the wall to keep you in place so you don’t run into it 🙂
This drill will be a bit more difficult than the previous one as you no longer have anything to hold onto. Or to help keep yourself balanced. At this point, it should just be your outstretched arms and the motion of your kick keeping you floating in the water.
If you feel yourself sinking (usually your legs and hips), grab onto the wall again to center yourself. You may find that you sink some when you lift your head to breathe. This is normal, as the motion of lifting your head causes your body to become unaligned.
More Content for You: How Many laps is Considered a Good Swim Workout?
To stop this, you can try to rotate your head to the side as you kick. However, this will take much more effort on your part. And you may end up inhaling some water.
You can also consider the option of a snorkel if you want to keep your body aligned and not worry about inhaling water.
4. Streamline Kick
Part of these flutter kick drills is progression, with each drill building on the previous and becoming more challenging. We suggest that you don’t move on to this step if you’ve struggled with the last drill.
If you have them, we suggest using swim fins and a snorkel to make things easier. Don’t have them? That’s okay! You can still do this drill but you’ll have to lift your head to breathe.
This drill will have you leaving the wall completely and finding your balance without the wall as an aide. You’ll push off from the wall and head down the length of the pool while holding streamline.
More Content for You:
- 7 Reasons to Wear Goggles When You Swim
- Can I Swim With Bad Eyesight?
- How to Pick the Right Swim Goggle for You
As a note: Streamline is when the arms are stretched up over your head with your hands held together. The sides of your arms should be tight enough that they press against your ears.
At this stage, don’t worry about pushing off under the water and coming to the surface. It’s easier to start when you’re already on top of the water and beginning your kick there.
- Push off from the wall on top of the water
- Hold streamline position as you push away from the wall
- Your head should stay neutral and looking down, as it was when you were kicking at the wall
- Find your balance as you glide away from the wall
- Once you have your balance, begin your kick
You will need to lift your head or rotate it to the side to breathe if you want to make it the entire length of the pool. If it’s easier for you, utilize a snorkel so you can keep your head in the neutral position and you don’t have to upset your balance.
5. Flutter Kick With a Board
When adding a kickboard to your flutter kick drills, you have two options to hold the board. Either with your arms about as wide as the board and holding at the edges of the board. Or together at the top of the board; almost as though you’re holding streamline.
Kicking with a kickboard has pros and cons, in that it can help you find balance in the water easier. But can also make your hips sink if you get lazy while kicking 😉
Related articles:
For this drill, you’ll want to rest your forearms on the kickboard and hold it out in front of you. The shorter side of the kickboard will be facing your chest while your arms run the length of the long side of the kickboard.
- Put the kickboard in front of you and in the water
- Grab the top of the kickboard and rest your forearms on the surface
- Extend your arms out all the way
- Begin kicking with your head out of the water
It’s incredibly tempting to want to bend your knees more at this point when you’re kicking. This is due to the kickboard giving you more balance and a place for your forearms to rest on. Remember to keep your knees slightly bent as you had been doing during the previous kicks.
If you need to, try kicking with a pull buoy between your thighs if you find yourself bending your knees too much. Sometimes this can help adjust the kick so you’re kicking from your thighs and not your knees.
6. Flutter Kick Holding the Board Out
To build on the previous drill (and make it more difficult), this flutter kick drill has your head in the water with the kickboard fully extended out in front of you. It is easier to use a snorkel and swim fins for this drill.
If you prefer to skip it though, just remember to lift or turn your head to the side to get your air 🙂
- Hold the board out in front of you so only your hands rest on it
- Your arms will be down in the water instead of resting on the board and your hands will hold the bottom part of the kickboard instead of the top
- Keep your arms shoulder-width apart
- Put your head in the water and begin kicking
Part of what makes this drill more difficult is that you don’t have the board to keep your upper body on the surface of the water. And by holding the board out in front of you, you have to find balance and use your core to keep from sinking.
More Content for You: The 10 Best Swim Fins for Swimmers
Be sure that you’re not putting all your arm weight on the board, causing it to pop out of the water at an angle. This drill focuses on balance, core strength, and keeping your head in a neutral position.
Using fins will make it much easier to find your balance and build into the drill until you’re ready to try without them.
7. Side Flutter Kick (Kicking on Your Side)
Unlike the previous drills, which have you on your stomach, this drill has you kicking on your side.
While it seems funny to kick on your side (especially when you swim freestyle on your stomach), this drill can help catch overly bent knees, builds into side breathing, and works your balance.
That’s a lot for just one flutter kick drill! We do suggest fins, as they’ll help keep you high in the water.
- To get started, push off the wall in a streamlined position
- Once you begin to slow in momentum, pick a side to roll to (we’ll use right for this example, flip if you prefer your left side)
- Your hips should be perpendicular to the bottom of the pool so that your right hip is facing the bottom and your left is facing the ceiling/sky
- When kicking on your right side, your right arm should be extended out in front of you with your head/ear resting just on your shoulder
- Your left arm should be resting at your side on top of your hip
- Keep your core tight as you begin to kick so your hips stay near the surface of the water
- Tilt your head up slightly to get your breath and return it to your shoulder to keep a neutral balance
Because there’s so much going on with this drill, give yourself plenty of time to build up to it. And build into it. If it’s easier to start with just floating on your side and then adding the kick once you’re comfortable with that, then do so!
More Content for You: 7 Best Waterproof MP3 Players for Swimming
You’ll find that if you’re bending your knees too much, you’ll feel the water pushing back against your legs more. You can also see them bending if you look down at your legs.
8. Vertical Kicks
Probably one of my favorite flutter kick drills. Although you can also use it for breaststroke and butterfly kick, too.
Vertical kicks are as the name implies. You’re kicking vertically instead of in the typical horizontal position. It helps focus on straight leg kicking, flexing the ankles and feet to push the water down, and engaging the core for the kick.
More Content for You: Best Women’s Swimsuits for Lap Swimming and Training
The only downside of this drill is that you’ll need deep enough water that you can’t touch the bottom of the pool. If your pool is shallow or doesn’t slope enough to have a deeper end, you won’t be able to try this drill.
If you do have a deeper section of your pool though, give it a try!
- In the deep end of the pool, align yourself so you’re vertical in the water. It should look like you’re standing in the water
- Use your arms to keep your head above the water with some light kicking
- When you’re ready, begin your flutter kick
- Let your hands rest just in front of you at the water level
- Try slow kicks at first to get the feeling of the water before kicking faster
- You can look down to see how much you’re bending your knees and check that you’re pointing your toes as you kick
We recommend that you start with short intervals of vertical kicking. About 15-20 seconds to start before stopping for a rest, and then starting again.
As you build up strength, you can increase the time that you’re kicking. You can also challenge yourself by keeping your hands out of the water instead of under the water.
In Closing
It may take some time to work through the various drills but the payoff of learning how to flutter kick is worth it! Take your time and keep practicing. If you feel that you’re struggling with a drill, try adding some fins or go back to the previous one.
Good luck!
As always, happy swimming!
Chevron
Bonus Content
Your Quick Guide to Swim Caps: If you’re searching for the best swim cap, you’ve probably already asked: what’s the best swim cap? Here’s a quick guide to the various types of swim caps that can be used by different swimmers.
Why Competitive and Lap Swimmers Should Lift Weights: Here’s what you should know about lifting weights as a swimmer. And why both competitive and lap swimmers should lift weights.
Want to Improve at the Pool?
Join swimmers and swim parents to receive my free newsletter and receive a free Swimming Glossary e-book as a thanks!
Every month you’ll receive tips and coaching to help you find success at the pool.
About

Chevron is a current competitive swimmer with almost 20 years of experience in the pool. And although she fell into the sport by accident in her high school years, she still trains daily and competes throughout the year. She’s committed to providing guidance to all levels of swimmers and believes that everyone should know how to swim.